I am developing the firmware for my solarclock project, and I've learned things, I thought it was worth sharing. It could be useful to others, interesting to you.
I should really have kept and exported all the documentation of the revision that I've sent to manufacturing, this is rather obvious in insight. Printing design documents can be useful when debugging and making the next revision.
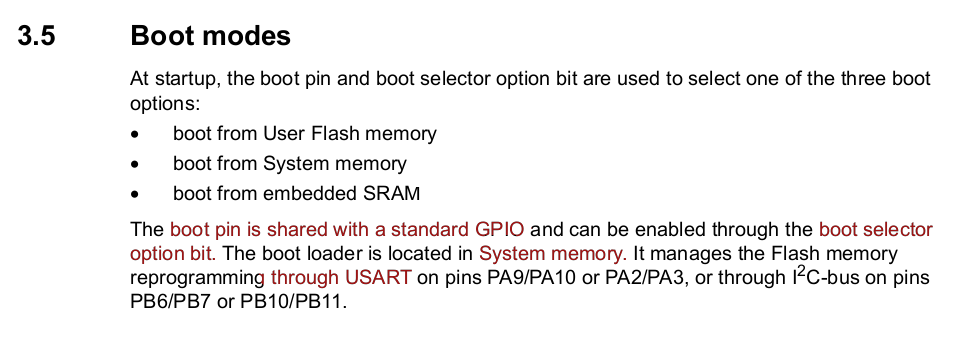
It looks rather simple to re-flash a microcontroller but there are a few traps, so let me explain how it works and what things mean.
This part of the documentation suggests that setting the PIN Boot0 sets the microcontroller in boot mode. But it also talks about the "boot selector option bit", and that it needs to be enabled for it to work. Frankly I skipped this step because I didn't understand what it meant at the time.
So what is this "boot selector option bit" ? First you need to connect the microcontroller to the computer, I simply use the USART interface with a USB to Serial device.
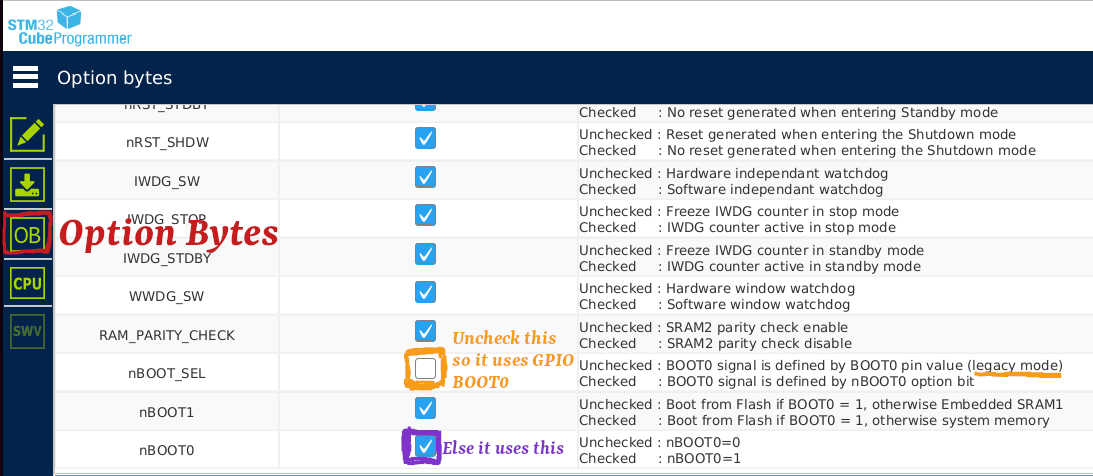
If you look at the Option Bits, in the "User Configuration" section, there is nBOOT_SEL, nBOOT1 and nBOOT0, these option bytes define how the microcontroller is going to start.
nBOOT_SEL decides if it should use the Option Bit nBOOT0 or instead use the GPIO PA14 (in my case for the STM32G030Fx TSSOP20 chip) correspond to BOOT0. This is checked by default.
So with that bit option unchecked and nBOOT1 checked, when the PA14 is low when the microcontroller is starting it will boot on the System Memory and the Bootloader will start, else it will go on flash where the application resides.
Well that's almost all you have to know, now you can start the chip bootloader and re-flash it.
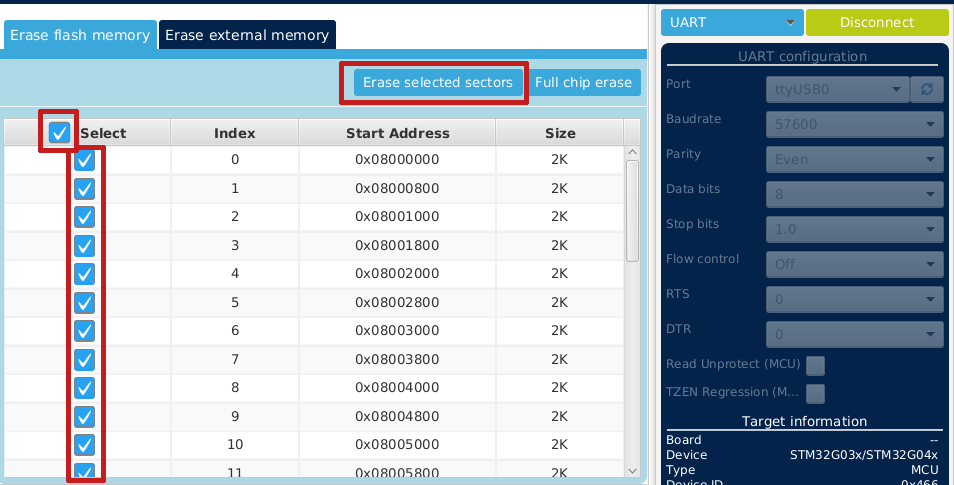
You also need to be aware that you need to erase the sectors where your program still is, the only way I was able to successfully do this through this software is by going to Erase flash memory, selecting all the sectors, and Erase selected sectors. If I don't do this and use Full chip erase instead, it doesn't work.
On the STM32, you usually have either JTAG or SWD for debugging, and while I've made all the pins accessible, they are also used by other components, so debugging is really impractical. So what I would do to make development easier, I would desolder the microcontroller, and wire a nucleo board to the pins. This way I could easily re-wire things, and use OpenOCD and the rest of the toolchain.
What I did well is to put a button on the BOOT0 pin, so when it's pushed when the board is powered on, it will boot on the bootloader and allow for flashing. Next time I need to also isolate the USART RX and TX to pins that are not used by the chip for its operations, so I don't need to plug / unplug uart each time I want to re-flash something.
The layout works well for the rest of the components (apart from the STM32 pin assignment), I would like to limit the current of the LED to 3/4 milliamps, instead of the current 7-8 mA, with the 300 Ohm resistor. I want to squish the numbers a bit so they are less tall and look better.
Next version, I've already planned to use a RTC (Real Time Clock), with a CR2032 coin battery to keep the time, and a Crystal for accurate time keeping. Ideally I would also like not to use multiple colour LEDs, as it increases the BOM cost.
The price of the board is entirely driven by 2 things, Minimum Quantity Order and Shipping / Tax. For LEDs, you may require 2 LEDs or 50, you will pay a minimum setup price. Thankfully it's not the case for the Micro Controller, which is the most expensive part of the BOM (91 cents), but you'll have to pay for the flat setup fee if you set 1 or 100. The shipping and Tax is almost half of the cost. So for the next run I'm bundling the PCBs of my different projects together, it's still only around $15, but no point paying multiple times for it.
I'll finish the current version and test if all the features work, and then I will make the layout of the next revision. Once this is made and fully tested, I'll make a nice box for it, and either conclude here, or make a small production run (20 boards).